|
Layout Process 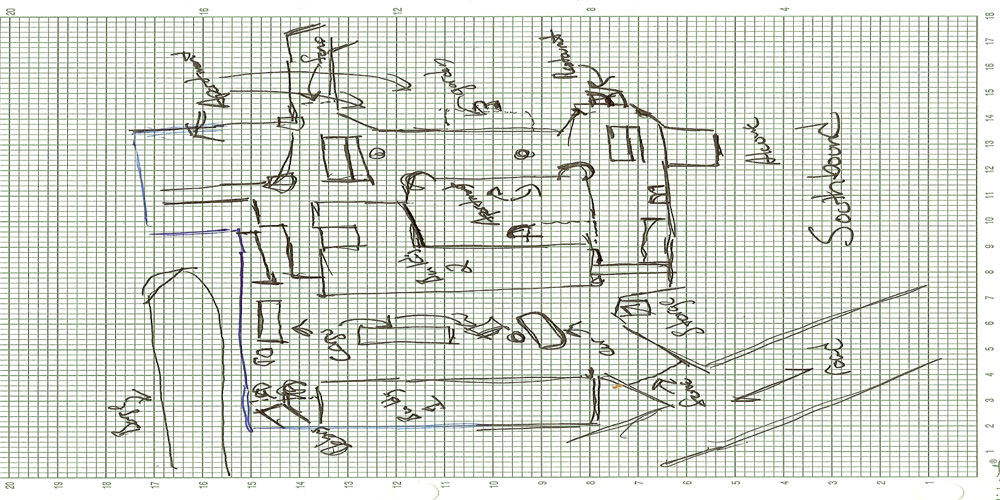 Despite UT3 being primarily a multiplayer game this map was created with single player in mind. As it doesnt contain multiple spawn points it is meant to be viewed with a bot count of 1. The map itself is a small, run down port town south of the border. While there are hints of an oriental influence the ornaments are primarily there to highlight the purpose of the different buildings, make a clear distinction between the docks area and the residential/market area and to add some features around the map to ensure the aesthetics support a run down town not an abandoned one. Building Process 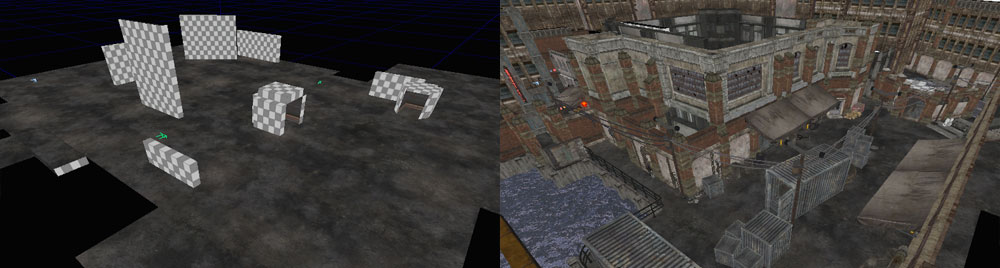 To begin the building process the map was first blocked off using only BSP additive brushes to ensure the flow was logical, smooth and scaled such that the later addition of static meshes would snap into place on a 16 spaced grid with minimal resizing. After the BSP was solid I began to add the static meshes that would define the game space such as walls and railings. From there I created each building completely before moving on to the next to help maintain a comparative scale between structures. Also this allowed me to be able to easier setup groups for each buildings static meshes so each one could be turned off and on as needed. After this I added the detail meshes, any textures that needed to be placed to tie areas together and then the water mesh. Finally I added any blocking volumes that were helpful in various locations. Also during this phase sounds were added. Using stock sounds sound cues were created and then setup in the sound cue editor to create effects such as cars passing by and waves crashing against the sea walls at random intervals and at various volumes to give the illusion that the sounds were coming from different distances from the players location. During this phase only a skylight was used to cut down on build times and once this phase was completed all BSP surfaces that would not be viewed by the player had their surface properties set to not accept any lights or dynamic lights as well as having their lightmap resolution set to 65536. Lighting Process 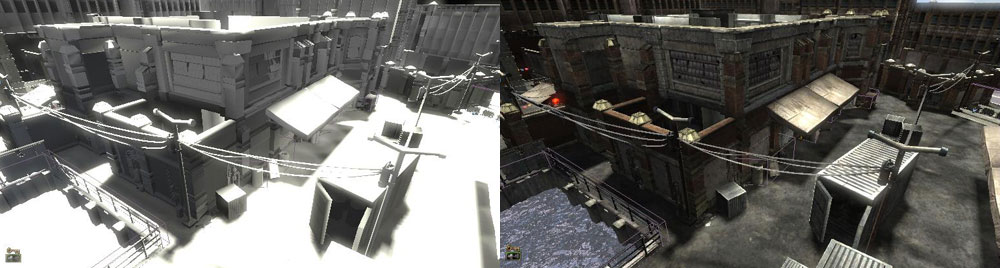 Once all of the meshes and sounds were in place I began to add the lights starting with the sun. For this 1 main directional light was used in conjunction with 4 other directional lights with the latter lights bringing out the harsh shadows created when the sun didnt directly hit a surface/mesh. As the map occurs in the day no area should be totally dark regardless of the location of the sun so the next step was to bring these dark areas out that werent affected by the supporting directional lights. After this any colored lights that were needed were added in their logical places. Final Steps  Among the final steps was the addition of a post process volume to add a soft bloom and weak DOF. Also as a final step a very slight fog was added to create a haze effect that could be caused by the hot southern sun. The map was then cooked and tested from the game itself on different machines. Once clean the maps ini, in-game thumbnail and readme were created and finally it was zipped up and uploaded. |