|
Layout Process  There were three things I used as guidelines when laying out this map. 1) There must be many ways to enter the building. 2) As it supports multi-player modes it must be setup in such a way that the enemies spawn in different positions in lots- of places all over the map. 3) The map should be very large but with lots of detail. Though the warehouse theme is way over done I decided to go with it anyway as I thought I could offer something different by making the outside and lower level larger and play just as important a role as the first floor level of the building. I also thought I could add some vertical stealth gameplay by utilizing the buildings roof. Also I thought I could get away from the crate maze by using the loading area of the floor level portion of the building for ranged gun play while using the three story office section as a more of a close combat gameplay area. In laying out the map I had to consider the different starting points for the different modes of play the map would support. As such there are four starting points for multi-player and one for single-player as this starting position coincides with the mission text. The guideline for multiple entry points helps accommodate the fact that it is a tactical game not a straight up run and gun shooter. Therefore the player needs to be offered more options for how they will enter the building and plan their own strategy. This helps foster some ownership of the players team. Once these criteria were in place it didnt take long to sketch out the map. Since it uses the Unreal engine I already had a good idea of the proportions I would be using in terms of doorways and the like. Once sketched out I began the building phase. Building Process 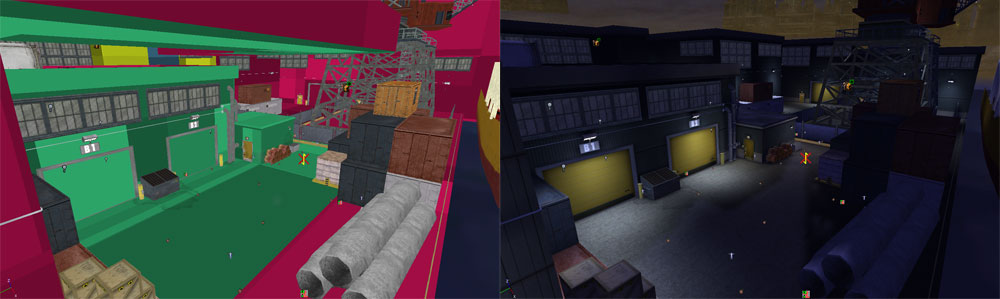 The building process for this map was very long. This mainly had to do with the amount of time I had to spend re-cutting the map for efficient zoning. The interior areas didnt prove difficult but because I had such a large and open outside area I had to do a great deal of brush work, via editing vertices, to make sure my zone portals blocked out as much as they could and didnt allow the player to view to many zones at once. While this wasnt difficult from an application stand point, as I was used to zoning a map, it did become somewhat of a brain teaser as I had to constantly be aware that anything I put outside could have a significant effect on performance. Once the zones were worked out it was simply a matter of placing the detail static meshes. This took a while as the map is large and, like the SWAT 4 map, is realistic and thus the static meshes had to be placed just so to aid in the illusion that it was an actual location. To further enhance the realism all of the windows in the map are breakable. Also, like the SWAT 4 map, the activity of the world makes sense from a logical standpoint. For instance the trucks in the warehouse are not just there arbitrarily but are having cargo lifted off of them, forklifts outside are carrying cargo, machines are running and putting out smoke, etc. Its important not to simply place realistic meshes simply because they are realistic but rather place them in the map because they are part of what would be going on in the world. Also since it is a cold map with snow on the ground I made sure to enable the zones so that you could see the breath of your NPC team mates. I think these are details that help sell a map. Finally the enemies had to be placed. To help with replay ability and to account for the multi-player experience a lot of spawn points were placed and percentages were assigned to each as to where enemies would appear. Also in this phase enemy templates were created so many of the enemies would have a wider variety of weapons they may spawn with as well as many more possible responses in seeing the players team. Lighting Process 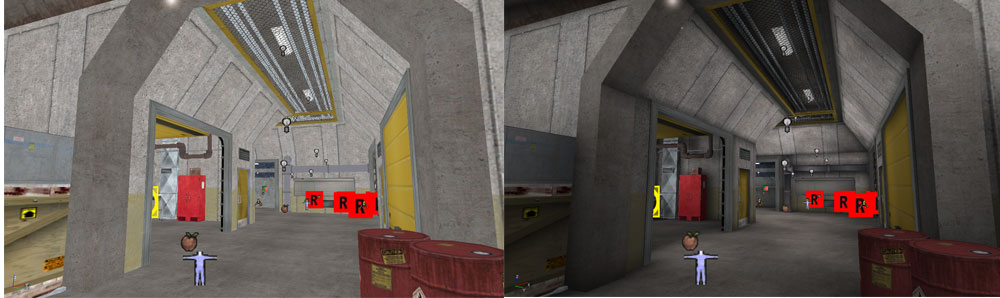 The lighting process in this map was only time consuming because the map is so large and has so many static meshes which all can take light differently. A lot of playing around with them takes place (as with all Unreal engine games) before the lighting works well. Also, as with the SWAT 4 map, the map had to pay close attention to the fact that every light source had to be accounted for as it is a realistic location. The brightness and radius had to be logical as well. If not the player may notice it and be pulled out of the experience. Final Steps  The final stage of this map was adding sound and testing. Because this map supports so many gameplay modes it was tested a great deal by friends and members of the Rainbow Six community. I received a lot of great feedback, especially in the multi-player portion and was able to really tighten that up. As stated before because I am a stickler for performance I was pleased that I never heard from anyone that had trouble running the map despite the fact that it was large and contained so many static meshes. This map was released in two community map packs. |